

Automating Terraform Deployments with Azure DevOps Pipeline
Deploy EC2 instance with Terraform using ADO (Azure DevOps) pipeline


Azure DevOps (ADO) is a cloud-based platform that provides a set of tools and services for software development, testing, and deployment. One of the key features of ADO is its pipeline service, which allows teams to create and automate a set of steps that make up their software delivery process.
An ADO pipeline typically includes several stages, such as build, test, and deployment. Each stage contains one or more jobs, and each job contains one or more tasks. Tasks can be used to compile code, run unit tests, build Docker images, or deploy applications to various environments.
Create Free Account for ADO
To get started you can create a free account on Azure DevOps. You can sign up from here https://azure.microsoft.com/en-in/products/devops
Before Getting started you can fork this project to get started https://github.com/SaumyaBhushan/ADO-example . We will use this one to create a pipeline.
Setup Project and Create Pipeline
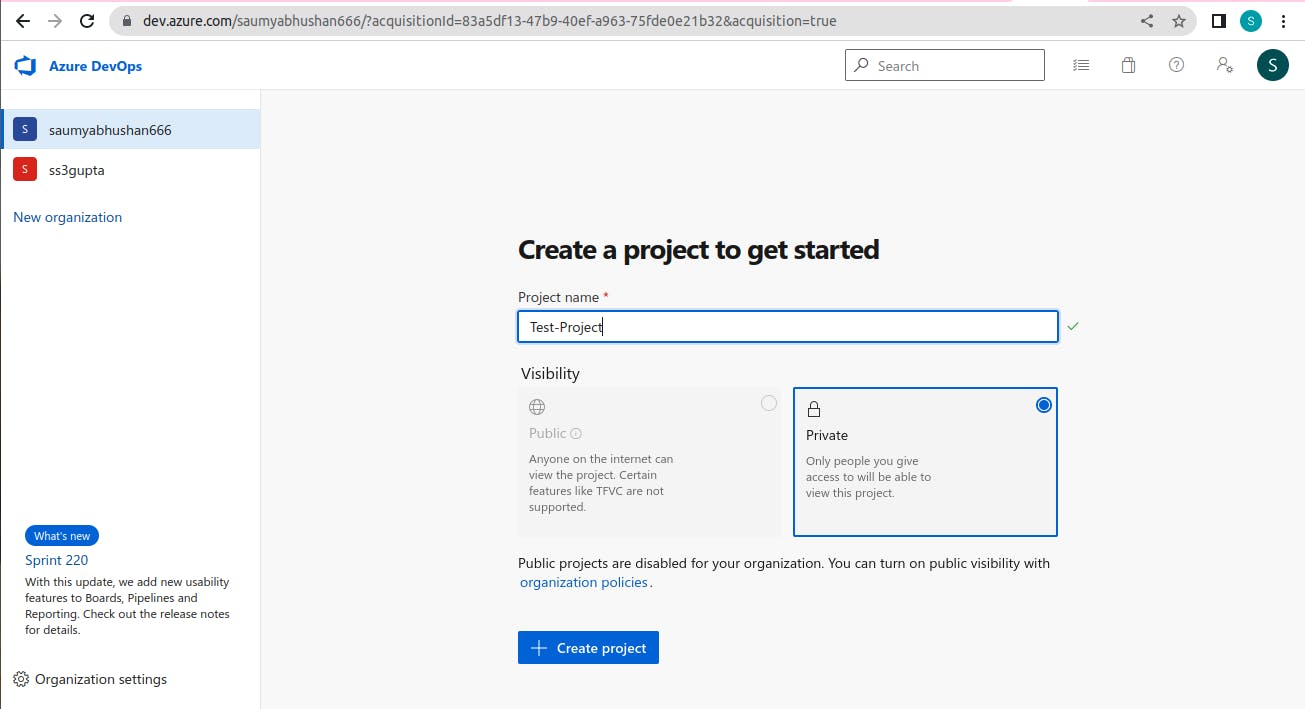
Step 1: After signing up you can create a new project by passing Project Name and then click on Create Project.
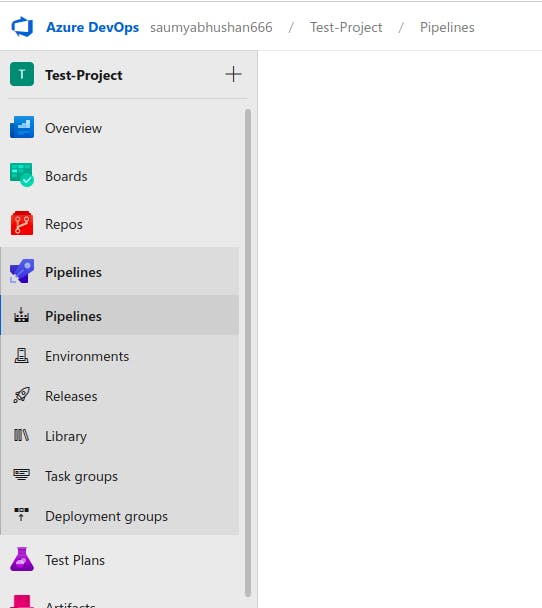
Step 2: Then on the Left side you can click on Pipelines and then select Pipelines options.
Step 3 : Click on Create Pipeline Button.

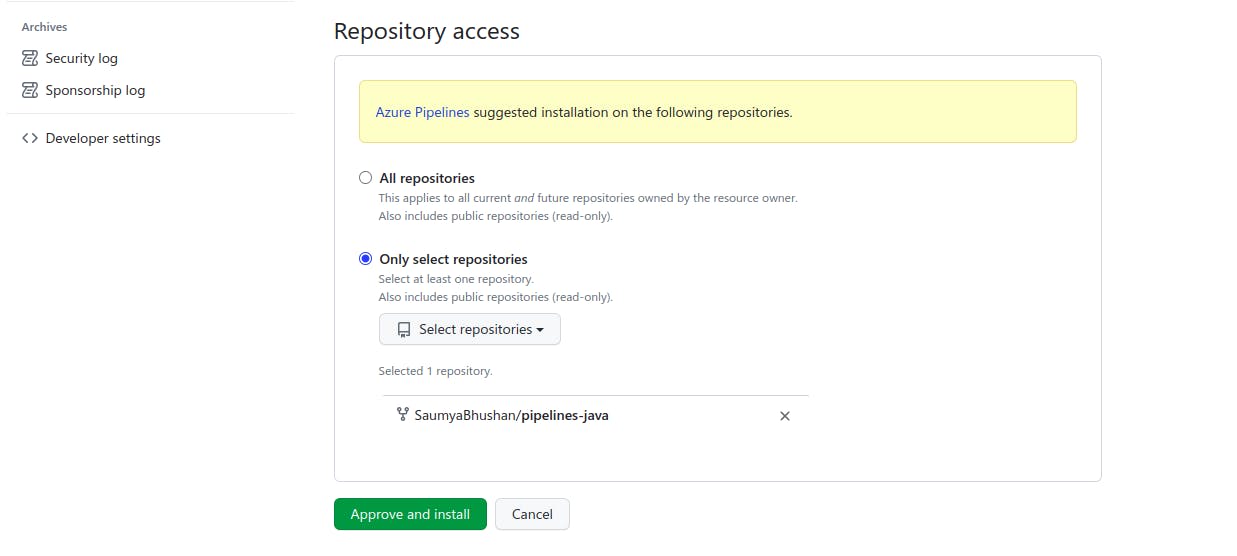
Step 4 : You can Connect to GitHub and then Select the repository which contains your ADO pipeline Yaml and project and then approve and install to configure your ADO with GitHub.
Step 5 : Then Select Existing Azure Pipeline Yaml File and pass in the required information and click continue.

If you are starting from a very new account you need to configure your own pool or self-hosted agent for that. Let's see how can we do that. If you have already some pool configured in your ADO you can use that one.
Step 6: You can install the predefined TerraformInstaller@0 task from the marketplace. Here is the link https://marketplace.visualstudio.com/items?itemName=charleszipp.azure-pipelines-tasks-terraform
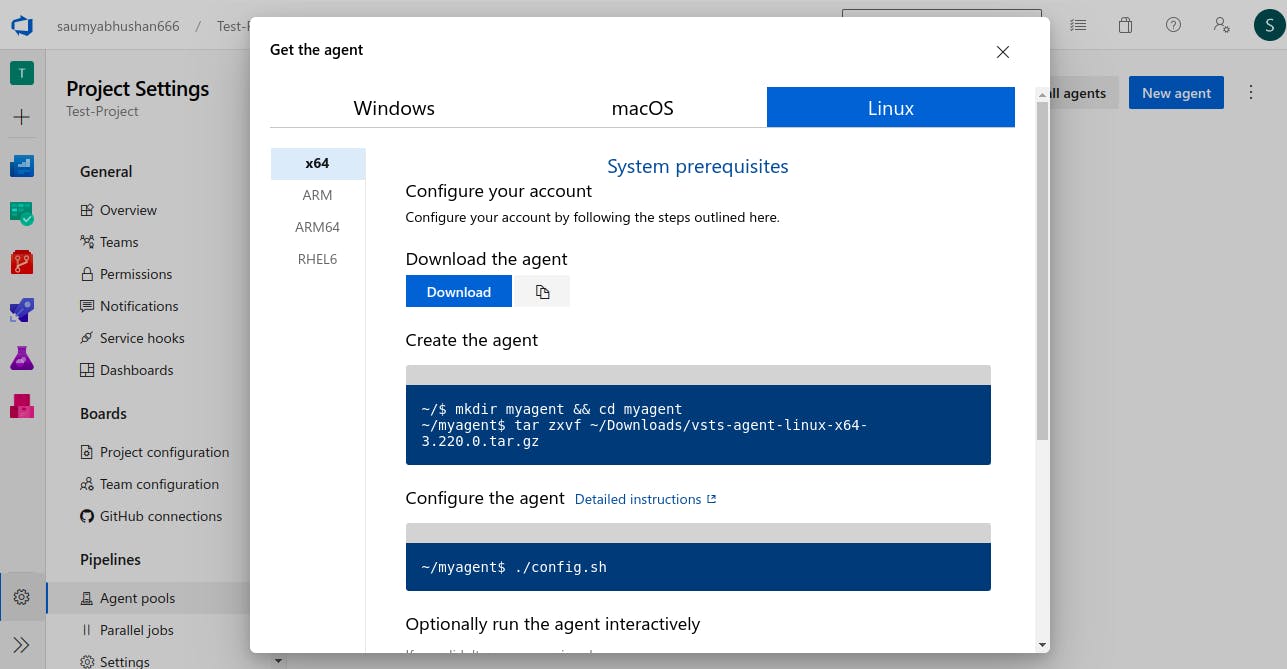
Configure your own agent pools :
Step 1: Go to Project setting and then select Agent Pools under Pipelines sections :
Step 2: Select the Default one and then click New agent. you will get something like this. Select your OS type and configure it accordingly.
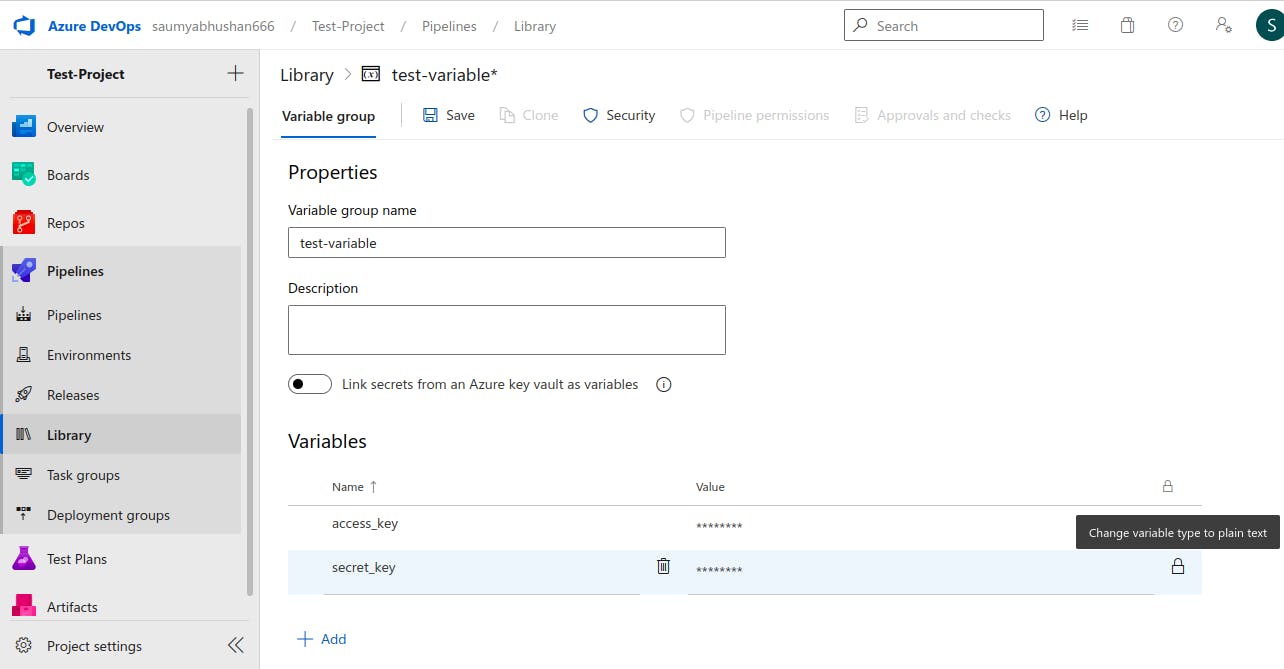
After that, you can create a variable group for your pipeline where you can store aws_access_key and aws_secret_key .
For that go to Pipelines >> Library >> variable group >> Create new and then provide the name for this new variable -group and add your variables and finally save it.
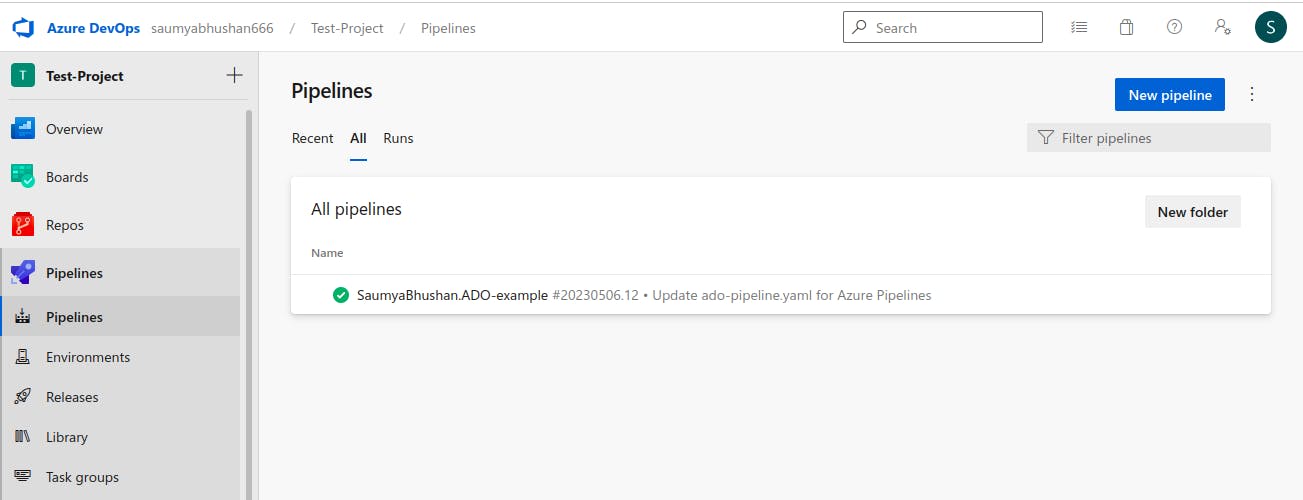
After this, you are ready and you can run your pipeline. Go to the Pipelines sections and select your pipeline. My pipeline name is SaumyaBhushan.ADO-example.
After that click on Run pipeline and run your pipeline you can change the parameter value. You can provide any instance_type

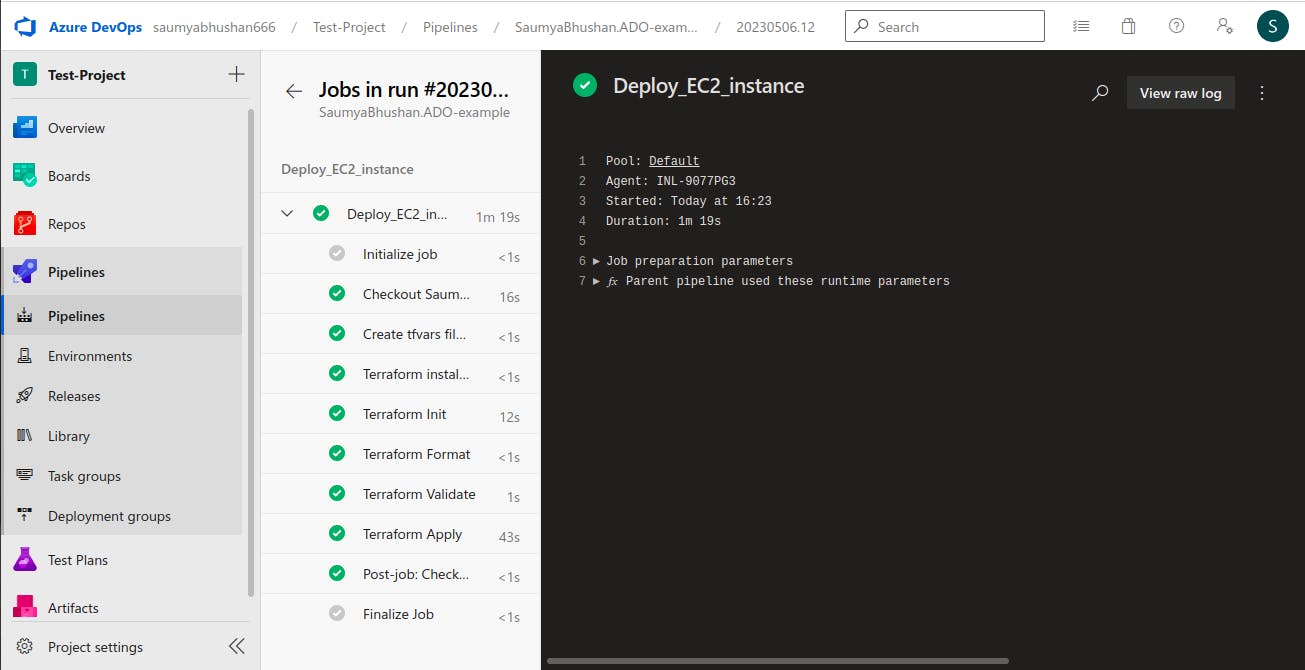
After that, you will see the logs of each step something like this. Here my pipeline passed and the ec2 instance has been deployed.
Let's verify it on the AWS portal. Here you go !!

Understanding the pipeline yml file
Let's see what we have mentioned in the ado-pipeline.yaml
parameters:
  - name: instance_type
    type: string
    default: "t3.micro"

pool: default

variables:
- group: test-variable

stages:
  - stage: Deploy_EC2_instance
    jobs:
      - job: Deploy_EC2_instance
        timeoutInMinutes: 10

        steps:

          - script: |
              (echo instance_type = '${{parameters.instance_type}}'
              echo access_key = '$(access_key)'
              echo secret_key = '$(secret_key)'
              ) > azure.auto.tfvars
            displayName: "Create tfvars file for EC2 Components"

          - task: TerraformInstaller@0
            displayName: "Terraform install v1.1.4"
            inputs:
              terraformVersion: "1.1.4"

          - script: |
              terraform init -upgrade
            displayName: "Terraform Init"

          - script: |
              terraform fmt
            displayName: "Terraform Format"

          - script: |
              terraform validate
            displayName: "Terraform Validate"

          - script: |
              terraform apply -auto-approve
            displayName: "Terraform Apply"
The pipeline script defines a parameter named instance_type that has a default value of t3.micro, and a pool named default. It also defines a variable group named test-variable which may contain additional variables used in the pipeline.
The pipeline has a single stage named Deploy_EC2_instance which includes a job named Deploy_EC2_instance. This job has a timeout of 10 minutes and includes a series of steps to be executed.
The first step creates a tfvars file for EC2 components using the parameter instance_type and the Azure access and secret keys provided through a variable group.
The next few steps involve installing Terraform (version 1.1.4), initializing the Terraform configuration, formatting and validating the configuration, and finally applying the changes to create the EC2 instance using the terraform apply command.
That's the end of this blog !! If you want me to write more blogs related to the ADO pipeline or if you are facing any issues while setting up the pipeline you can comment I will get back to you.
I will publish blogs on more advanced pipeline concepts and DevOps Concepts, so you can follow me on hashcode and Twitter for more such content.